Posts

IMG_0407_altered

The Basics of Saddle Fitting – Part 2

The Basics of Saddle Fitting – Part 2

Finding the Right Saddle for You and Your Horse

by Caitlin Waufle

As we continue our saddle search from the Fall issue, it is now time to try some saddles on your horse.  Take your drawings to your local tack shop, or make an appointment with a saddle fitter, and pick up as many saddles in the correct tree size and seat size for and your discipline.

Start trying them on your horse following these important guidelines:

1.  Observe the balance of the saddle from front to back.  The sweet spot for the rider should be approximately halfway between the pommel and the cantle.

2.  Make sure the panel is making contact with the horse’s back all the way from front to back and does not bridge anywhere.  The panel needs to distribute your weight evenly, so if the contact is lighter in one area than another, it cannot effectively distribute your weight.

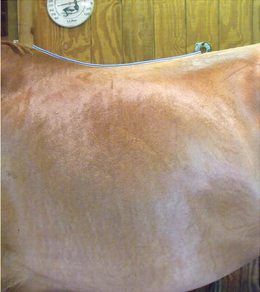
3.  Make sure there is adequate clearance above your horse’s spine to avoid concussion on the spine.  There should never be less than 2 fingers clearance when girthed and mounted on the horse.

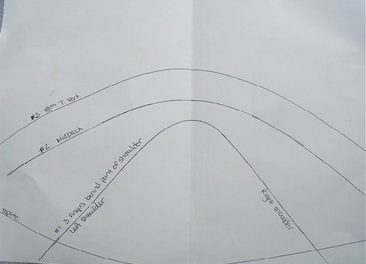
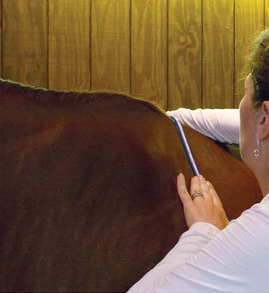
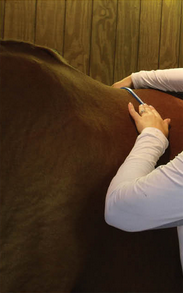
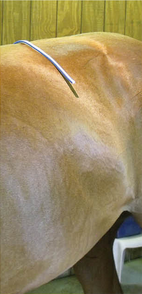
4.  Assess the length of the panel on the horse’s back and make sure that it does not extend pass the horse’s 18th thoracic vertebrae.

They say a picture is worth a thousand words, so shown here are samples of each type of saddle discussed in the first part of the article series: close contact / jumping saddle, an all purpose saddle, and a dressage saddle.

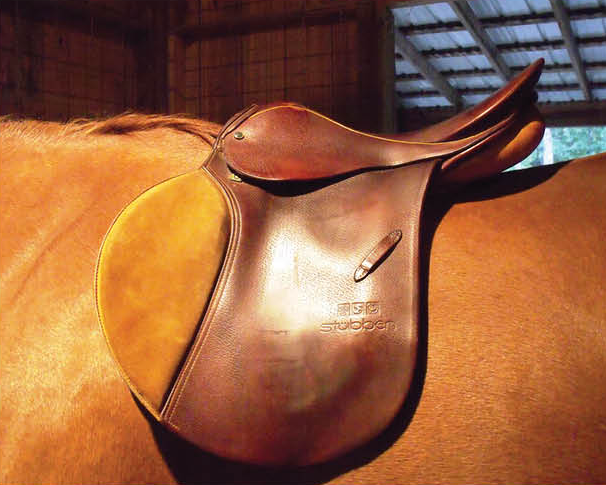
As you can see from the pictures, the close contact / jumping saddle is too wide and the balance is too forward.  This will cause the rider to be pitched forward and will cause the horse discomfort due to inadequate wither clearance and improper distribution of the rider’s weight beneath the tree points.

close-contact

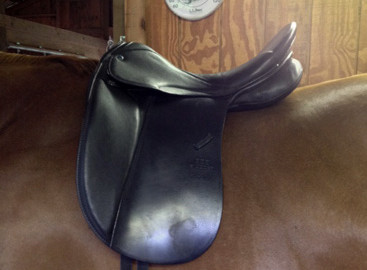
In the photo of the all purpose saddle, you can see that the saddle is too narrow and the balance of the saddle is too far back.  This will cause the rider to be pitched too far back and cause the horse discomfort due to too little spinal clearance beneath the cantle and distribution of the rider’s weight beneath the cantle.  Also, when the angle of the tree point is too narrow, they dig into the horse’s muscle and cause extreme discomfort.  I often liken this feeling for the horse as if you wore shoes that are too small for your feet and then being asked to jog around the block.

all-purpose

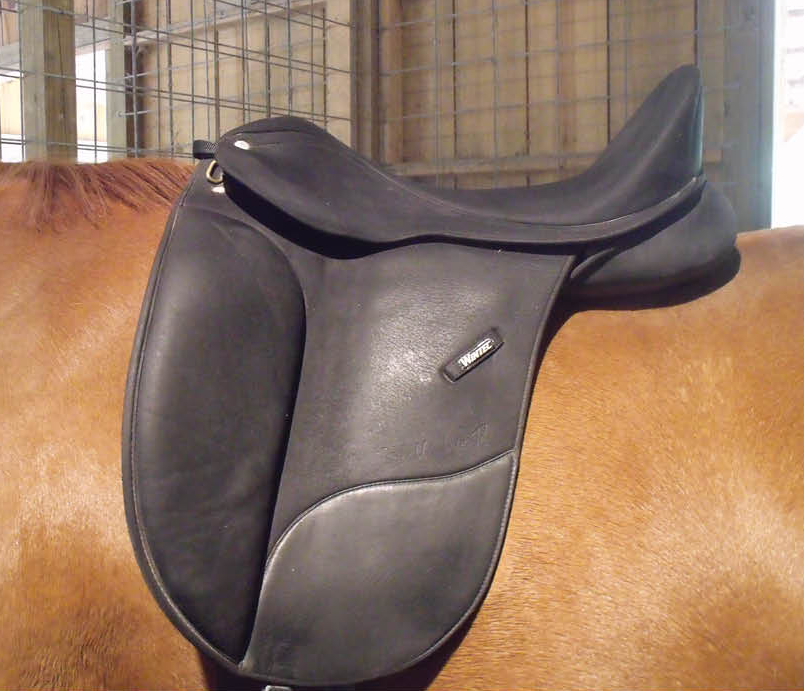
The last picture shows a dressage saddle fitting the horse well.  The balance of the seat is halfway between the pommel and cantle which allow the rider to seat balanced in their tack.  The clearance above the horse’s spine is perfect and the weight distribution on the panel is great.  This allows the rider’s weight to be spread across the largest bearing surface.

dressage

After all the guidelines have passed inspection, girth your horse and go through these steps once more.  How will you know if the horse likes the saddle?  While he is not going to talk like Mr. Ed, your horse will communicate his like and dislike of saddles.  All of us have seen horses buck upon picking up the canter or go around the ring head straight up in the air and tension written all over their face.  These horses are communicating discomfort.  Look for signs of relaxation like stretching, chewing / licking the lips, and tracking up at the walk, trot, and canter to communicate a preference for a particular saddle.  If your horse exhibits tension, swishing of tail, and kicking out it is time to move on to the next saddle.  Trust your horse, he will tell you if he is uncomfortable in his tack.  So, if all is going well on your horse’s front, how do you like the saddle?  Is it comfortable in the seat and does it place your leg in an effective position?  I recommend recording both your horse’s and your own reaction to each saddle so that you can compare them to make the most educated decision about which saddle to choose.

Hopefully these steps will help you on your way to finding the right saddle that works for both you and your horse.  If you need more assistance, I recommend getting a saddle fitter to come and assess your situation and help you get the best saddle for you and your horse.

This article was initially featured in the Winter 2014 Issue of The Waxhaw Equestrian Magazine and is posted on our website with prior permission.

IMG_0407_altered

The Basics of Saddle Fitting – Part 1

The Basics of Saddle Fitting – Part 1

Finding the Right Saddle for You and Your Horse

by Caitlin Waufle

On more than one occasion, a customer walks into the store and says “Finding the right saddle is proving to be harder than it was to find the right horse.”  Not only do you have to fit the saddle to the rider, but it also has to fit the horse.  If you gather the correct information it does not have to be difficult.  Take it step by step, break down each component, fit each one individually, and then put all the pieces of the puzzle back together again.

Let’s begin with your horse.  Does your horse have a high prominent wither or a low “mutton” wither?  Is your horse built uphill or downhill?  Does he have a long back or a short back?  Determining each of these will help provide a picture of how your horse is put together.  The best way to begin is by doing a tracing of your horse’s back.  Here are instructions for a simple tracing of your horse’s back.

article-saddle-fit-tracingSteps to doing a tracing on your horse:

1.  Place horse on level ground preferably in crossties, standing as square as you can get him, this means the horse’s four feet should make an imaginary square.

2.  Place a bendable ruler (available at any tack store or arts and crafts store) over horse’s back, three fingers behind the point of the shoulder and press evenly to contour to the shape of your horse’s back.article-saddle-fitting-1  Lift the ruler carefully and place it gingerly onto a large folder.  Trace the inside curve onto the folder and indicate which side is the left shoulder / side and which is the right shoulder / side.  This indicates whether your horse has high prominent withers or flat mutton withers, atrophy behind the scapula, and tells us the appropriate width of the gullet angle needed.

3.  Next, place the ruler over the horse’s mid-back and repeat tracing the inside curve onto the folder.article-saddle-fitting-2  This indicates the channel width required on the proper fitting saddle.

4.  Next, locate the horse’s 18th thoracic vertebrae by feeling for the last rib (look for where the hair grows straight down towards the ground just before the horse’s flank) and follow up to the horse’s spine.article-saddle-fitting-3article-saddle-fitting-4  Now lay the bendable ruler once again over the horse’s back and repeat tracing onto folder.

5.  Last, flatten the ruler and contour to your horse’s topline between the first place you traced and the last place you traced.article-saddle-fitting-5  And, trace the underside once again onto the folder.  This indiates the topline build of the horse; whether he is uphill, downhill, or sway backed.

Once these tracings are complete take them to your tack shop and they can do measurements to begin to tell you what your horse needs for a good fit.

Now that the horse has been considered it is the rider’s turn.  First, the rider must decide what type of riding they wish to do.  If interested in jumping fences, then a close contact or jumping saddle will be best.  If dressage / flatwork is your choice then a dressage saddle will most likely be the best choice.  If all of the above interests you (and you can afford only one saddle) then an all-purpose saddle is the one for you.

To determine your correct seat and flap length, you need to go sit in some saddles.  When seated in a correctly fitted saddle, you should have a palm width between the pommel and your pelvis and a palm width between your derriere and the end of the cantle.  This is no time for vanity, no squeezing into a smaller saddle when you need a larger seat.  Once your find your correct seat size, the flap length can be slightly more challenging to find, due to the length of the stirrup required for each discipline.  When your foot is in the stirrup at the correct length for your discipline, your knee should fit perfectly into the knee roll of an all-purpose or close contact saddle and in the thigh block of the dressage saddle.  If your knee extends over the front of the flap of a standard flap then you need a longer or more forward flap.  If your leg does not reach the knee roll / thigh block and cannot be used effectively than you need a saddle with a short flap.

Catch more important saddle fitting information in the November / December issue of The Waxhaw Equestrian, as Caitlyn will discuss putting the two pieces of the puzzle together and trying saddles on your horse.

This article was initially featured in the Fall 2014 Issue of The Waxhaw Equestrian Magazine and is posted on our website with prior permission.