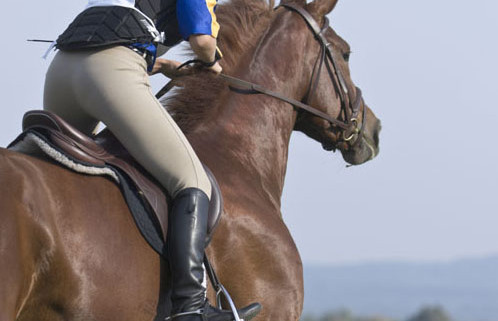
Choose The Right Body Protector
Please visit our friends over at Horse Journal for a great article on
Waxhaw Tack Exchange is reposting this article more informational purposes only. All viewpoints and rights are retained by the original author.

Please visit our friends over at Horse Journal for a great article on
Waxhaw Tack Exchange is reposting this article more informational purposes only. All viewpoints and rights are retained by the original author.
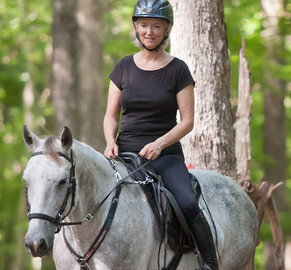
When I first started taking riding lessons as an adult in my mid-thirties, I had a wonderful riding instructor. She taught riding in the arena for three lessons a month but on the fourth (and best) week we went for a trail ride. Everyone in the class loved trail riding week. Our instructor wanted us to enjoy riding on trails as much as we did our lessons in the arena and she wanted us to be safe and schooled in proper trail etiquette.
Since then I have logged many hundreds on miles on trails. Some of those rides have been high points in my life, but some of those rides have been less than ideal. I prefer that ALL my trail rides (and yours) are safe and fun. So, with that in mind, here are some basic rules to keep you and your trail mates safe and sound.
So many years later, I know I need to school my horse in the arena sometimes, but trail riding will always be my favorite way to spend time with my horse and my friends. In summary, please remember that we’re all out on the trail to relax and have fun. Follow the basic rules of trail riding etiquette and others will enjoy riding with you. As my favorite childhood cowboy, Roy Rogers, said … Happy trails to you … (you old riders know the rest of the song).
This article was initially featured in the Fall 2014 Issue of The Waxhaw Equestrian Magazine and is posted on our website with prior permission.
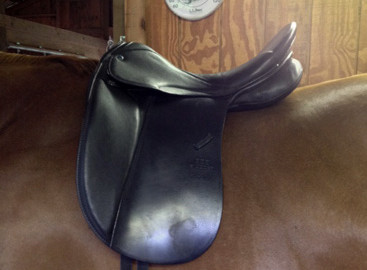
On more than one occasion, a customer walks into the store and says “Finding the right saddle is proving to be harder than it was to find the right horse.” Not only do you have to fit the saddle to the rider, but it also has to fit the horse. If you gather the correct information it does not have to be difficult. Take it step by step, break down each component, fit each one individually, and then put all the pieces of the puzzle back together again.
Let’s begin with your horse. Does your horse have a high prominent wither or a low “mutton” wither? Is your horse built uphill or downhill? Does he have a long back or a short back? Determining each of these will help provide a picture of how your horse is put together. The best way to begin is by doing a tracing of your horse’s back. Here are instructions for a simple tracing of your horse’s back.
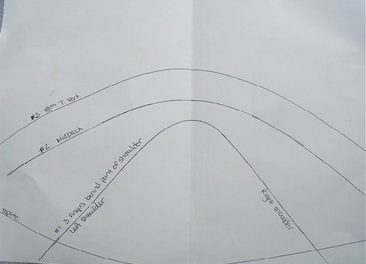 Steps to doing a tracing on your horse:
1. Place horse on level ground preferably in crossties, standing as square as you can get him, this means the horse’s four feet should make an imaginary square.
2. Place a bendable ruler (available at any tack store or arts and crafts store) over horse’s back, three fingers behind the point of the shoulder and press evenly to contour to the shape of your horse’s back.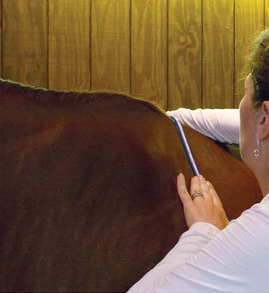 Lift the ruler carefully and place it gingerly onto a large folder. Trace the inside curve onto the folder and indicate which side is the left shoulder / side and which is the right shoulder / side. This indicates whether your horse has high prominent withers or flat mutton withers, atrophy behind the scapula, and tells us the appropriate width of the gullet angle needed.
3. Next, place the ruler over the horse’s mid-back and repeat tracing the inside curve onto the folder.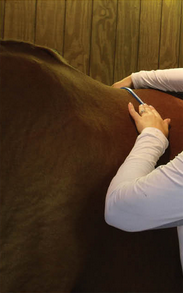 This indicates the channel width required on the proper fitting saddle.
4. Next, locate the horse’s 18th thoracic vertebrae by feeling for the last rib (look for where the hair grows straight down towards the ground just before the horse’s flank) and follow up to the horse’s spine.
 Now lay the bendable ruler once again over the horse’s back and repeat tracing onto folder.
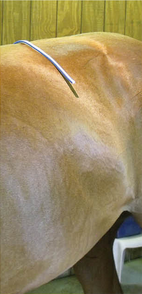
5. Last, flatten the ruler and contour to your horse’s topline between the first place you traced and the last place you traced.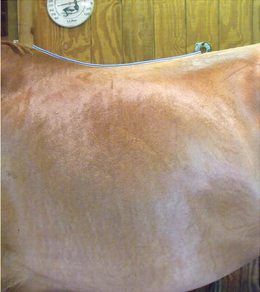 And, trace the underside once again onto the folder. This indiates the topline build of the horse; whether he is uphill, downhill, or sway backed.
Once these tracings are complete take them to your tack shop and they can do measurements to begin to tell you what your horse needs for a good fit.
Now that the horse has been considered it is the rider’s turn. First, the rider must decide what type of riding they wish to do. If interested in jumping fences, then a close contact or jumping saddle will be best. If dressage / flatwork is your choice then a dressage saddle will most likely be the best choice. If all of the above interests you (and you can afford only one saddle) then an all-purpose saddle is the one for you.
To determine your correct seat and flap length, you need to go sit in some saddles. When seated in a correctly fitted saddle, you should have a palm width between the pommel and your pelvis and a palm width between your derriere and the end of the cantle. This is no time for vanity, no squeezing into a smaller saddle when you need a larger seat. Once your find your correct seat size, the flap length can be slightly more challenging to find, due to the length of the stirrup required for each discipline. When your foot is in the stirrup at the correct length for your discipline, your knee should fit perfectly into the knee roll of an all-purpose or close contact saddle and in the thigh block of the dressage saddle. If your knee extends over the front of the flap of a standard flap then you need a longer or more forward flap. If your leg does not reach the knee roll / thigh block and cannot be used effectively than you need a saddle with a short flap.
Catch more important saddle fitting information in the November / December issue of The Waxhaw Equestrian, as Caitlyn will discuss putting the two pieces of the puzzle together and trying saddles on your horse.
This article was initially featured in the Fall 2014 Issue of The Waxhaw Equestrian Magazine and is posted on our website with prior permission.